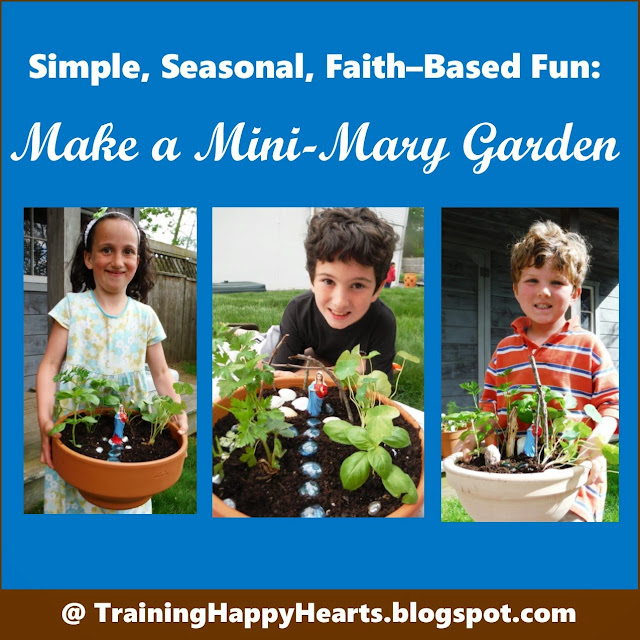
If you're looking for an easy, enjoyable faith-based craft to close out the month with, how about creating a mini-Mary garden?
Last week, in honor of the feasts of Our Lady of Fatima and St. Isadore the Farmer, we gathered with friends to do just that. Since the month of May is dedicated to Mary, however, anytime this month would be a perfect time to make such gardens.
I know we are delighted that our friend suggested hosting a mini-Mary garden making event, as making the gardens proved easy and fun. Before we made them, we prayed a decade of a rosary together and, afterward, we enjoyed plenty of time chatting and playing the beautiful sunshine, so it made for a perfect afternoon! And, now, we are excitedly watching our herbs grow. (Please, dear God, do not let my "black thumb" kill our edible plants before we can harvest them!)
Suggested Supplies
If you'd like to make your own gardens, you simply need to gather some basic supplies.
(Note: Some of the links which follow are affiliate ones for your convenience.)
This is what we used:
- a variety of herbs and plants. (We used parsley, basil, strawberries and nasturtium because it was what a local nursery had for us. However, you could use traditional Mary Garden plants, too.)
- 10-14 inch round pots that are about 6 inches deep. (My childred used heavy, breakable ones purchased at a local discount shop. Some of our friends wisely ordered lightweight, unbreakable 14-inch TerraBowl Planters.)
- small statues of Mary. (We used these Immaculate Heart of Mary Statue Favors, which our friend ordered inexpensively as a twelve count.)
- potting soil
- hand trowels
- shells
- other decorative items from nature or your craft bin
Putting Your Mini-Mary Gardens Together
Supplies gathered, the hands-on fun can begin!
1. Fill your pot with soil.
2. Decide where you want your Mary statue to be.
3. Determine where you want your herbs to be. Take them out of their original containers, loosen their roots slightly, dig small holes in the soil in your planters, put the root balls in, and pat the soil firmly, but gently, around the root balls.
4. Decorate as desired with gems, shells, sticks and more. (Luke made a blue gem pathway in the shape of a cross and a little arbor our of twigs. Nina chose to put Mary in the center with a gem pathway up to her and shells around her. Jack decorated with shells and gems in a rather symmetrical design and added some twigs, too.)
5. Add your final touches and water gently.
It's that easy! And, if you don't have the "right" size pot, don't worry. Even in smaller containers, the gardens look great!
We'd love to see how your gardens come out! Feel free to comment with a picture or post a snapshot of your Mini-Mary Garden at our Training Happy Hearts Facebook Page.


